Some
Notes on Constructing and Installing The Dallas Semi One-Wire Weather Station
and
Tucson Amateur Packet Radio T-238 Controller for APRS

Index of Items
So here it is. The box plugged in, on-line and running. The case is sitting on top of one of Scott Ratchford's Citadel touchscreen computers. You will not 2 RS232 cables plugged in. I wired on specially. Using just two wires to tap one of the other connectors and let me monitor the packet activity using BuxTerm (K4ABT). Notice the barrier terminal block next to the T238 case. The Cat5 cable comes down to the block and I attached a Radio Shack 12 Inch Modular to Spade Line Cord (279-391) to connect to the RJ-11 on the T-238
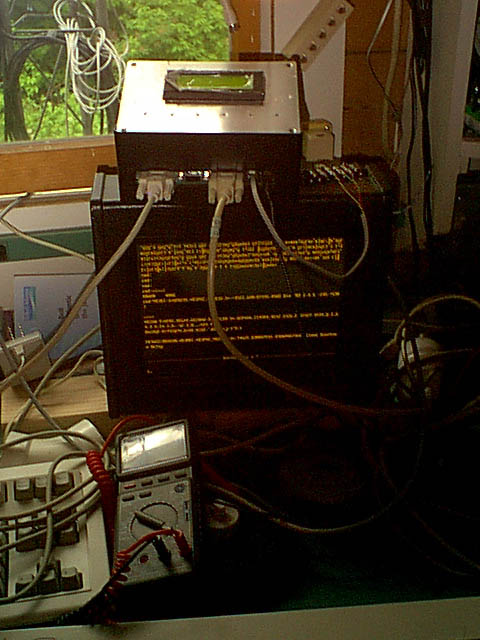
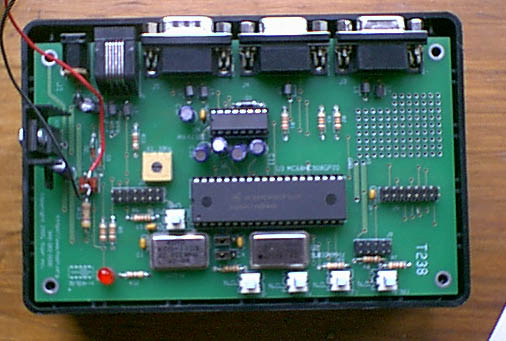
I finally had to compromise and mount the T-238 into a Radio Shack 270-1807 case which is cavernous (see other note). I laid out the holes for mounting the T-238 PCB on 3/4 inch standoffs and found even with the large size of the case I had to grind down two little plastic studs at the bottom of the case. I then laid out and cut a single rectangular hole along the side to allow the connectors to protrude.
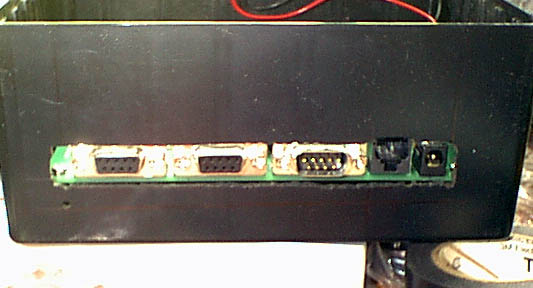
The hole was cut via multiple holes with the drill press then a hacksaw blade and a file. Not that the RJ-11 stucks up a bit more than the rest and will need to be filed extra.
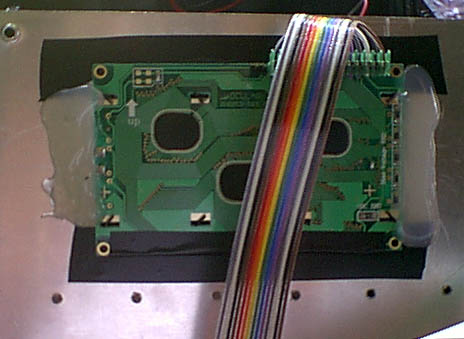
The mounting holes in the display module were so tiny that I had no screws anywhere in my junkbox that were small enough. Soooooooooooo ... out with the hot glue gun. I taped the exposed header ends and the mounting plate as well and then temporarily hot glued the display to the plate. The six other holes are for the four push buttons, the LED, and a backlight on off switch.
I mounted the whole shooting match, boom with One-Wire station, junction box with full length of cable attached, to do the sensor calibration. In this case its nothing more than moving the vane clockwise several times and then pointing true north. The luck of the Irish was with me as True North (compass reading adjusted for magnetic deviation) lined up with the selected boom position. Note the use of a level!
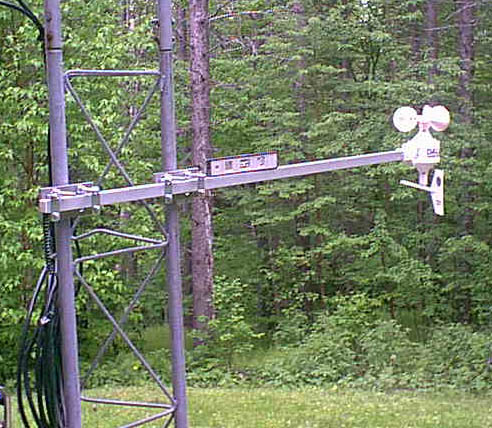
A closeup of the mounts. This whole process is important not just to avoid having to calibration up on the tower, but it gets you use to what will have to be done up the tower. Better to find out about tricky stuff on the ground not fifty feet in the air. The bottom opening in the junction box will be closed with Duct Seal electricians putty once the unit is up on the tower and the boom wire connected in place, the the cover placed on the box.

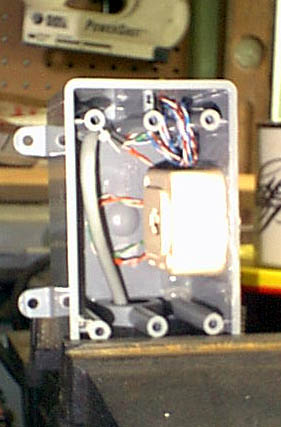
I used a standard Gray Carlon Box with a single 1/2 inch
conduit opening as a junction box. I drilled a hole inside through one of the ribs to anchor a zip tie
as strain relief. I stripped off plenty of insulation so the there would be enough
lead length for mistakes
and changes. The Radio Shack RJ-11 female block was hot glued in place so no holes
needed to be made through to the
outside. Extra wire pairs were coiled up to one side. I had several Rat Shack project
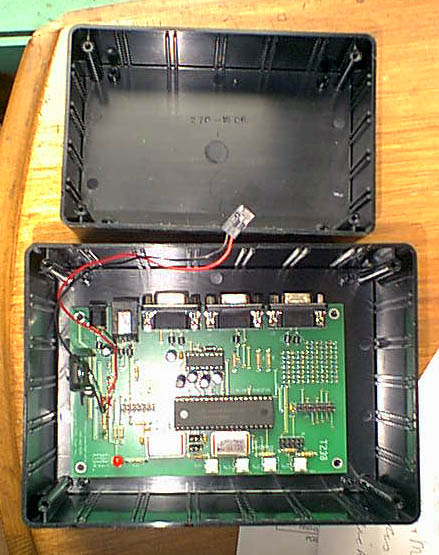
cases around and the 270-1806 (6x4x2) seems perfect, that is,
until you try it! The board is about one half inch too big in
both dimensions. It hangs up on the mounting studs for the cover screws. See
below I then tried the next size up the
270-1807 (7x5x3) and it is cavernous in comparison. See below. The solution, in my rarely so
humble opinion is to pare down the PC Board to make it fit the 270-1806. Its
not much real estate to give up. Given the generous nature of the T238
design it shouldn't be difficult.
The two halves of the shell don't mount very firmly to the boom even when the screw is tightened. So I used a hot glue gun to attach one half of the outer shell to the boom. Be
careful not to get any glue on the mating edges of the shell. I then assembled the rest as per instructions adding only some silicone sealant/adhesive to the mating side for the square boom. By doing it this way
| You get a good seal all around |
|
| You get a solid mount |
|
| You can still open the shell up (you hot glued only one side) |
The end edges of the square stock may need to be de-burred and even polished a bit. Get it real smooth. Then, I used some clay/putty-like stuff electricians use called Duct Seal. To fill about the last two inches of the tube and hold the wire down that end of the tube.

After packing it in, I took the white cap which I had notched and carefully inserted it lining up the wire so it wouldn't be bound against a sharp edge and then abraid and/or break.

When fully inserted, the cap and putty will completely seal the tube. I also used some duct seal on the closed end. Be careful not to get any on the RJ11 receptacle that might foul the contacts. The stuff is gooey!

The boom will be mounted to the tower using two mounting plates for cross-arms I picked up at a hamfest awhile back. They are made from 5/16 aluminum plate and came drilled to handle standard U-bolt sizes. I bought them for a couple of bucks apiece from a ham named Ernie Gray, WA1NIE, Box 63, Epping, NH 03042. I have no idea if he is still making them, it was quite awhile ago. It may be worth a try though. They make the mounting rock solid which is an absolute necessity here. My tower is at 1600 feet on a slope of Mount Mansfield. I often see gusts over 80 mph occasionally over 100 mph!

The wire will go into a gray Carlon Box an RJ-11 receptacle wired to some Cat-5 cable and down to the shack.
Contact Brian Riley, KA2BQE for details.